API Access & Client Setup
Use your Coding Plan key from the API directly or wire it into Claude Code, OpenClaw, Cursor, Codex, and other coding clients.
Calling the API Directly
Coding Plan traffic flows through a dedicated API key that is separate from your standard Atlas Cloud key.
- Base URL:
https://api.atlascloud.ai/v1 - API Key: Generate one from Plan Management → Get API Key.
Request and response shapes follow the OpenAI-compatible specification — see Model APIs for full examples.
Client Configuration
Most coding tools (OpenClaw, Hermes, OpenCode, Cursor, Copilot, …) take an OpenAI-compatible endpoint:
https://api.atlascloud.ai/v1Claude Code, which speaks the Anthropic Messages protocol, points at:
https://api.atlascloud.aiThe sections below walk through the most common tools.
Claude Code
Configure environment variables
Important: replace
ANTHROPIC_AUTH_TOKENbelow with the API key you generated on the Atlas Cloud console.
Settings file location:
- Windows:
%USERPROFILE%\.claude\settings.json - macOS / Linux:
~/.claude/settings.json
Edit settings.json and set the API key and the model you want to route through:
{
  "env": {
    "ANTHROPIC_AUTH_TOKEN": "atlas-api-key",
    "ANTHROPIC_BASE_URL": "https://api.atlascloud.ai",
    "ANTHROPIC_MODEL": "zai-org/glm-5.1",
    "ANTHROPIC_DEFAULT_HAIKU_MODEL": "zai-org/glm-5.1",
    "ANTHROPIC_DEFAULT_SONNET_MODEL": "zai-org/glm-5.1",
    "CLAUDE_CODE_DISABLE_EXPERIMENTAL_BETAS": "1"
  }
}
OpenClaw
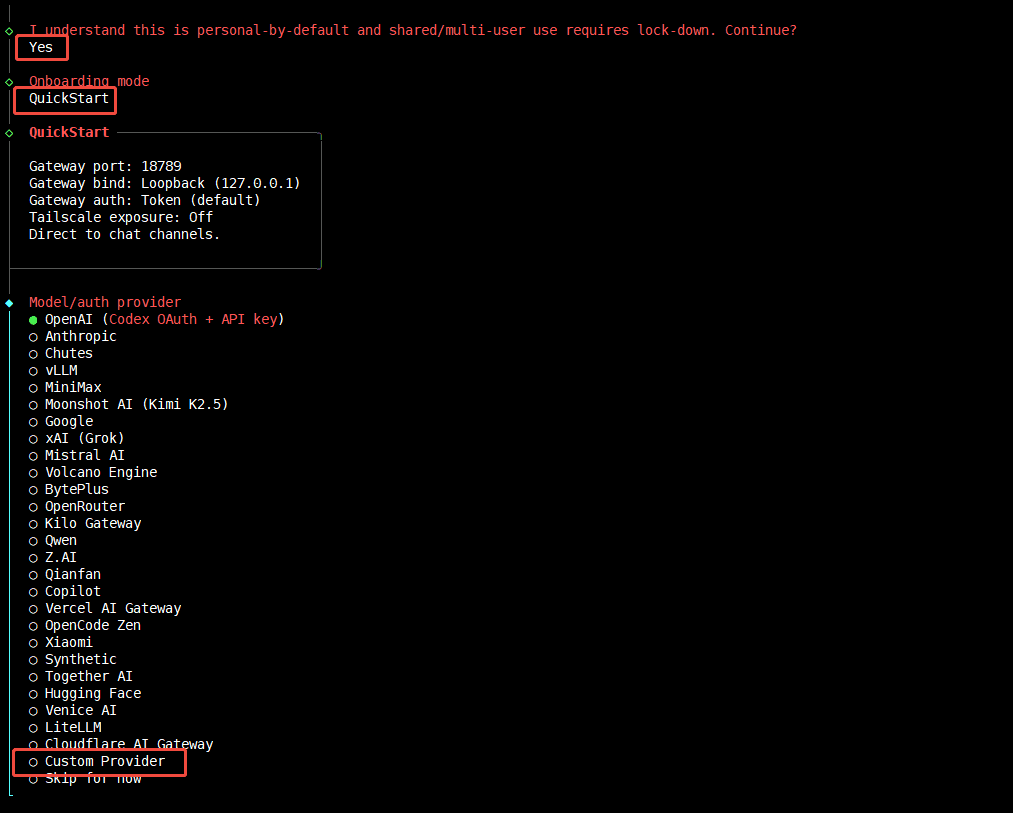
1. Run the OpenClaw onboarding wizard
After installation, open your terminal (SSH / CMD / Terminal) and launch the wizard:
openclaw onboardSelect Yes → QuickStart → Custom Provider, then:
- Enter the API Base URL:
https://api.atlascloud.ai/v1 - Paste your Atlas Cloud API key.
- Paste the model ID. Choose the OpenAI-compatible protocol.
- Verify the connection — you should see
Verification successful. - Give the endpoint a custom ID and display name.
2. Or configure the settings file directly
- macOS / Linux:
~/.claude/settings.json
{
  "baseUrl": "https://api.atlascloud.ai/v1",
  "apiKey": "your-atlas-key",
  "api": "openai-completions",
  "models": [
    {
      "id": "zai-org/glm-5.1",
      "name": "zai-org/glm-5.1",
      "contextWindow": 200000,
      "input": ["text"]
    }
  ]
}
Hermes
Add a custom OpenAI-compatible provider in Hermes to plug in Atlas Cloud:
-
In the provider list, choose Custom endpoint (enter URL manually).
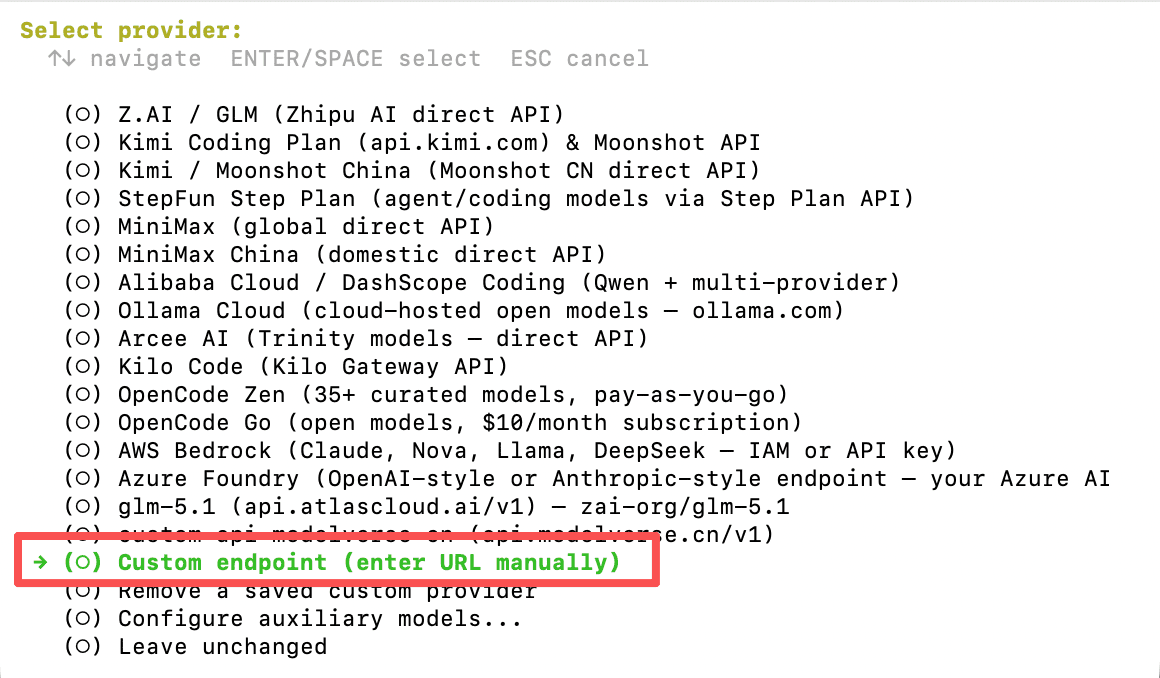
-
Set API base URL to
https://api.atlascloud.ai/v1and paste your Coding Plan API Key as the API key. Once the endpoint is verified, the available models show up: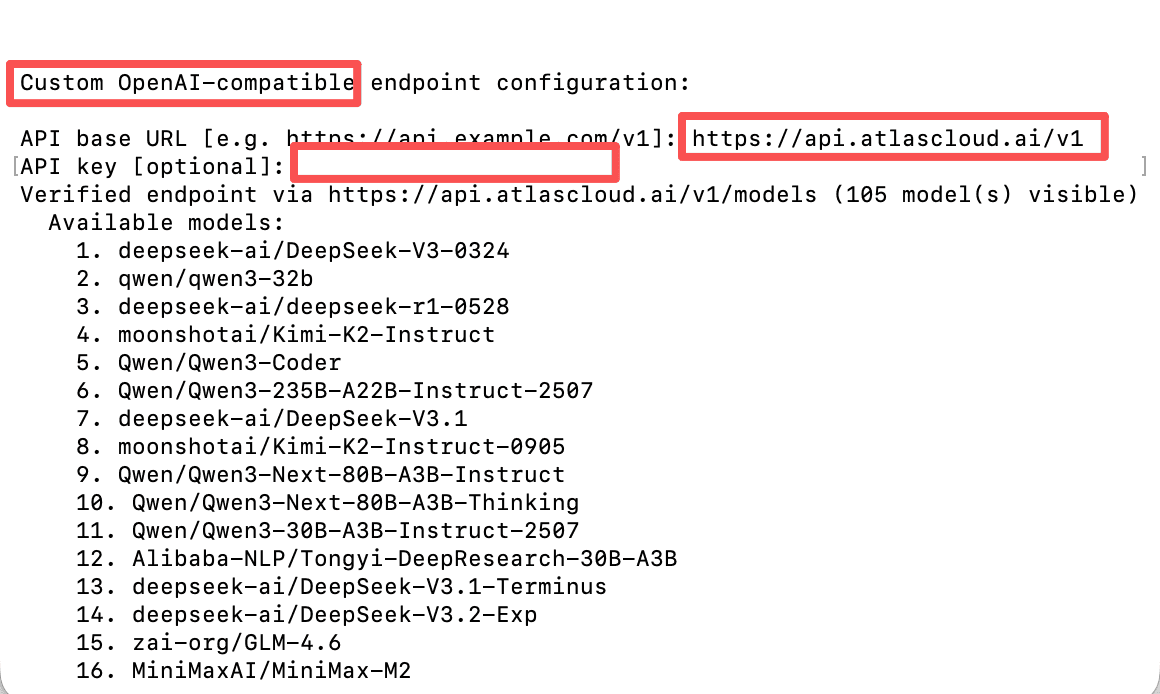
Trae
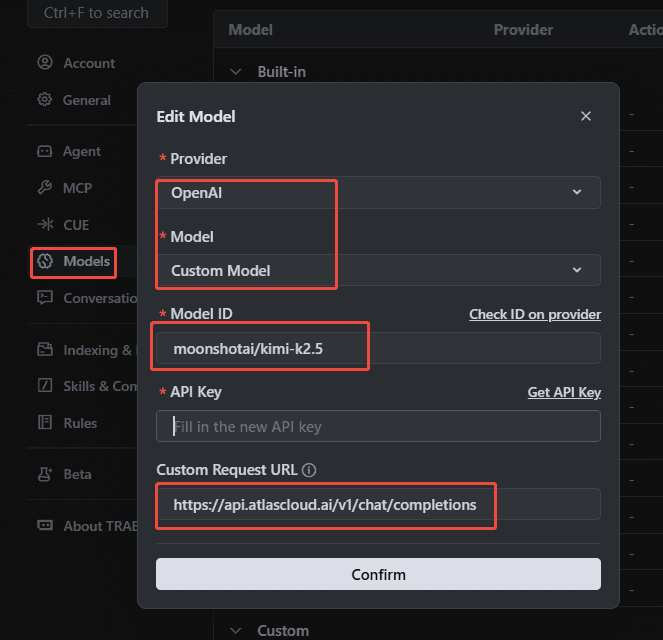
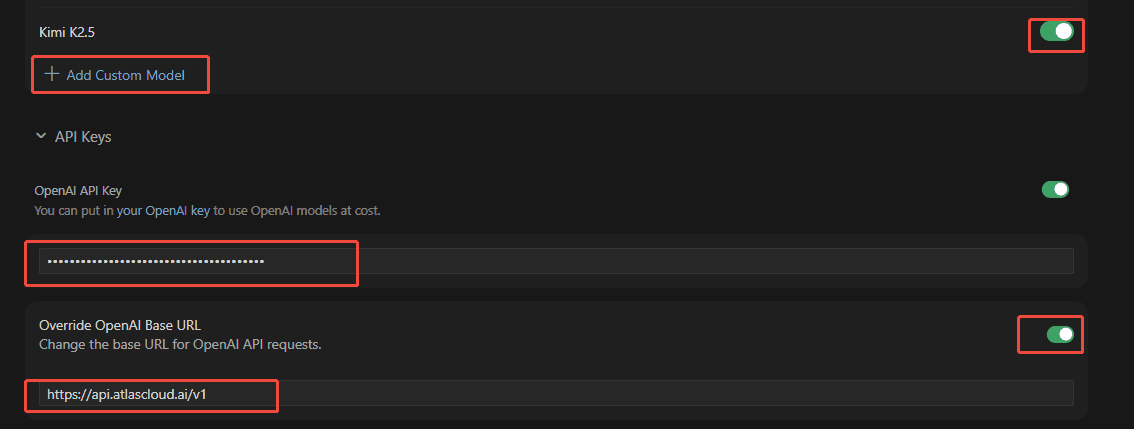
In Trae, add a custom OpenAI-compatible provider with the Atlas Cloud base URL and your Coding Plan API key.
Cursor
In Cursor → Settings → Models, add a custom OpenAI-compatible model pointing at https://api.atlascloud.ai/v1.
OpenCode
Open the OpenCode config file opencode.json:
- Linux:
~/.config/opencode/opencode.json - Windows:
%USERPROFILE%\.config\opencode\opencode.json
Provider config
{
  "$schema": "https://opencode.ai/config.json",
  "provider": {
    "atlascloud": {
      "npm": "@ai-sdk/openai-compatible",
      "name": "atlascloud",
      "options": {
        "baseURL": "https://api.atlascloud.ai/v1",
        "apiKey": "your-atlas-api-key"
      },
      "models": {
        "zai-org/glm-5.1": {
          "name": "glm-5.1"
        }
      }
    }
  }
}
Codex
1. Register the provider
On macOS or Linux, create ~/.codex/config.toml:
model_provider = "atlas_coding_plan"
model = "zai-org/glm-5.1"

[model_providers.atlas_coding_plan]
name = "atlascloud"
base_url = "https://api.atlascloud.ai/v1"
wire_api = "chat"
requires_openai_auth = true
2. Add your API key
Create ~/.codex/auth.json:
{
  "OPENAI_API_KEY": "atlas-api-key"
}
Replace
atlas-api-keywith the key you generated on the Atlas Cloud console.
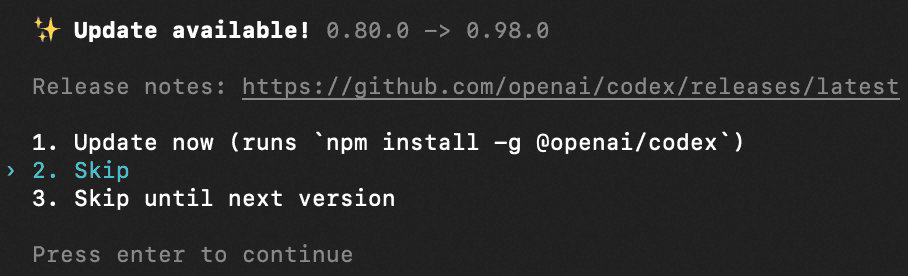
3. Start Codex
codexSkip the update prompt and you're ready to go.